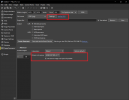
Question for those using PTGui with their evo 2 pro. I'm using affinity photo and having trouble filling in the sky (the evo seems to leave a larger black area than my phantom 4 pro). Anyone have a good work flow, preferably for affinity photo? Also, I edit all my pano images before exporting them into PTGui and I'm noticing that the stitched 360 panorama's quality looks nothing like the images before being stitched together?? Any input and help it greatly appreciated.
You are using an out of date browser. It may not display this or other websites correctly.
You should upgrade or use an alternative browser.
You should upgrade or use an alternative browser.
Ptgui
- Thread starter @JD
- Start date
herein2021
Well-Known Member
Question for those using PTGui with their evo 2 pro. I'm using affinity photo and having trouble filling in the sky (the evo seems to leave a larger black area than my phantom 4 pro). Anyone have a good work flow, preferably for affinity photo? Also, I edit all my pano images before exporting them into PTGui and I'm noticing that the stitched 360 panorama's quality looks nothing like the images before being stitched together?? Any input and help it greatly appreciated.
I use PTGui all the time for both Rectilinear Panos as well as full 360 panos; below is my workflow:
- Shoot pano with 20% overlap using RAW images
- Import all images into Lightroom and apply the usual color correction and horizon straightening
- Export all images to full resolution TIF images
- Import all TIFs into PTGui and stitch the images using PTGui
- Export the final Stitched images to a single TIF
- If this is a rectilinear pano project and there are any stitching errors I then import the pano into PhotoShop and fix any stitching errors then export to TIF
- If this is a rectilinear pano project I then import the TIF into Paint.Net and crop the image to the delivery resolution and export it to the final pano using 100% JPG during export
- If this is a spherical 360 pano I instead import the full TIF image into PTGui and export as a website project or I import the TIF into PhotoShop and add the sky then import into PTGui. From there I modify the website code to integrate into the client's website
One Ashley Tower - Elevation Views
One Ashley Tower | VUMEDIA Group
My biggest problem right now is that after editing all of my images first(in which they look great and the sky is blue etc) than I stitch them together in PTGui and the image looks worse, blue sky is blown out white for the most part after stitching in PTGui? any thoughts or ideas?? I keep seeing these amazing 360's that look like the photos taken, not mine?I use PTGui all the time for both Rectilinear Panos as well as full 360 panos; below is my workflow:
The Zenith hole (directly above the EVO II) will be larger than with other drones because the EVO II 6K has a 35mm FF equiv FOV vs other drones which tend to have a 24mm or 16mm FF equiv FOV. I assume that you have the EVO II 6K, I'm not sure what the FOV is for the 8K. To fix the Zenith hole you need to do a sky replacement in PhotoShop or use the blending features in PTGui. Below is a link to what this all looks like when it is complete.
- Shoot pano with 20% overlap using RAW images
- Import all images into Lightroom and apply the usual color correction and horizon straightening
- Export all images to full resolution TIF images
- Import all TIFs into PTGui and stitch the images using PTGui
- Export the final Stitched images to a single TIF
- If this is a rectilinear pano project and there are any stitching errors I then import the pano into PhotoShop and fix any stitching errors then export to TIF
- If this is a rectilinear pano project I then import the TIF into Paint.Net and crop the image to the delivery resolution and export it to the final pano using 100% JPG during export
- If this is a spherical 360 pano I instead import the full TIF image into PTGui and export as a website project or I import the TIF into PhotoShop and add the sky then import into PTGui. From there I modify the website code to integrate into the client's website
One Ashley Tower - Elevation Views

One Ashley Tower | VUMEDIA Group
vumediagroup.com
herein2021
Well-Known Member
My biggest problem right now is that after editing all of my images first(in which they look great and the sky is blue etc) than I stitch them together in PTGui and the image looks worse, blue sky is blown out white for the most part after stitching in PTGui? any thoughts or ideas?? I keep seeing these amazing 360's that look like the photos taken, not mine?
Are you exporting from PTGui as JPG? I always export from PTGui as TIF and convert to JPG using Paint.net, not because I have had any problems with PTGui's JPG conversion but simply because I prefer Paint.net for any final processing I may need.
If your PTGui JPG export settings are set to something really low like 30% quality it could result in the problems you describe. I would check my JPG export settings in the PTGui Export tab.
Another problem could be the color space. Are you using sRGB color space when you export from Affinity Photo or Adobe RGB? If you are exporting as Adobe RGB, PTGui may not understand the color space which would cause undesirable side effects. I have never used Affinity Photo so it may even use a custom color space, I would definitely try exporting to sRGB color space.
Also, what is your output color space? I use Adobe RGB for my color space within all of my cameras for maximum quality but I always deliver sRGB to my clients for maximum compatibility.

Last edited:
Nice web site! Just wondering what you're using for a 360 viewer - is it WP3D WP plugin?I use PTGui all the time for both Rectilinear Panos as well as full 360 panos; below is my workflow:
The Zenith hole (directly above the EVO II) will be larger than with other drones because the EVO II 6K has a 35mm FF equiv FOV vs other drones which tend to have a 24mm or 16mm FF equiv FOV. I assume that you have the EVO II 6K, I'm not sure what the FOV is for the 8K. To fix the Zenith hole you need to do a sky replacement in PhotoShop or use the blending features in PTGui. Below is a link to what this all looks like when it is complete.
- Shoot pano with 20% overlap using RAW images
- Import all images into Lightroom and apply the usual color correction and horizon straightening
- Export all images to full resolution TIF images
- Import all TIFs into PTGui and stitch the images using PTGui
- Export the final Stitched images to a single TIF
- If this is a rectilinear pano project and there are any stitching errors I then import the pano into PhotoShop and fix any stitching errors then export to TIF
- If this is a rectilinear pano project I then import the TIF into Paint.Net and crop the image to the delivery resolution and export it to the final pano using 100% JPG during export
- If this is a spherical 360 pano I instead import the full TIF image into PTGui and export as a website project or I import the TIF into PhotoShop and add the sky then import into PTGui. From there I modify the website code to integrate into the client's website
One Ashley Tower - Elevation Views

One Ashley Tower | VUMEDIA Group
vumediagroup.com
herein2021
Well-Known Member
Thank you, it comes with PTGui, if you export as a web page it automatically creates the files and includes the viewer, I have the Pro version, I am not sure about the other versions.Nice web site! Just wondering what you're using for a 360 viewer - is it WP3D WP plugin?
AirStag
Well-Known Member
- Joined
- Jun 27, 2020
- Messages
- 134
- Reaction score
- 57
- Age
- 64
Beautiful work!I use PTGui all the time for both Rectilinear Panos as well as full 360 panos; below is my workflow:
The Zenith hole (directly above the EVO II) will be larger than with other drones because the EVO II 6K has a 35mm FF equiv FOV vs other drones which tend to have a 24mm or 16mm FF equiv FOV. I assume that you have the EVO II 6K, I'm not sure what the FOV is for the 8K. To fix the Zenith hole you need to do a sky replacement in PhotoShop or use the blending features in PTGui. Below is a link to what this all looks like when it is complete.
- Shoot pano with 20% overlap using RAW images
- Import all images into Lightroom and apply the usual color correction and horizon straightening
- Export all images to full resolution TIF images
- Import all TIFs into PTGui and stitch the images using PTGui
- Export the final Stitched images to a single TIF
- If this is a rectilinear pano project and there are any stitching errors I then import the pano into PhotoShop and fix any stitching errors then export to TIF
- If this is a rectilinear pano project I then import the TIF into Paint.Net and crop the image to the delivery resolution and export it to the final pano using 100% JPG during export
- If this is a spherical 360 pano I instead import the full TIF image into PTGui and export as a website project or I import the TIF into PhotoShop and add the sky then import into PTGui. From there I modify the website code to integrate into the client's website
One Ashley Tower - Elevation Views

One Ashley Tower | VUMEDIA Group
vumediagroup.com
Great - nice to know. Useful when stitching photos with PTgui - I'll have to experiment with it for my Ricoh Theta Z1 360s instead of the Theta Stitcher.Thank you, it comes with PTGui, if you export as a web page it automatically creates the files and includes the viewer, I have the Pro version, I am not sure about the other versions.
Thank you for replying. So I have gotten really close to the end product I'm looking for in creating 360's with the evo 2 pro. From Lightroom to ptgui and then on to photoshop. I have downloaded an adobe's stock 360 sky to replace the skies in my 360's. All has worked great and it looks amazing.....except...I can't seem to get the gradient tool to work from the horizon up slightly to remove the 'seam' between the two images? any thoughts?I use PTGui all the time for both Rectilinear Panos as well as full 360 panos; below is my workflow:
The Zenith hole (directly above the EVO II) will be larger than with other drones because the EVO II 6K has a 35mm FF equiv FOV vs other drones which tend to have a 24mm or 16mm FF equiv FOV. I assume that you have the EVO II 6K, I'm not sure what the FOV is for the 8K. To fix the Zenith hole you need to do a sky replacement in PhotoShop or use the blending features in PTGui. Below is a link to what this all looks like when it is complete.
- Shoot pano with 20% overlap using RAW images
- Import all images into Lightroom and apply the usual color correction and horizon straightening
- Export all images to full resolution TIF images
- Import all TIFs into PTGui and stitch the images using PTGui
- Export the final Stitched images to a single TIF
- If this is a rectilinear pano project and there are any stitching errors I then import the pano into PhotoShop and fix any stitching errors then export to TIF
- If this is a rectilinear pano project I then import the TIF into Paint.Net and crop the image to the delivery resolution and export it to the final pano using 100% JPG during export
- If this is a spherical 360 pano I instead import the full TIF image into PTGui and export as a website project or I import the TIF into PhotoShop and add the sky then import into PTGui. From there I modify the website code to integrate into the client's website
One Ashley Tower - Elevation Views

One Ashley Tower | VUMEDIA Group
vumediagroup.com
herein2021
Well-Known Member
Thank you for replying. So I have gotten really close to the end product I'm looking for in creating 360's with the evo 2 pro. From Lightroom to ptgui and then on to photoshop. I have downloaded an adobe's stock 360 sky to replace the skies in my 360's. All has worked great and it looks amazing.....except...I can't seem to get the gradient tool to work from the horizon up slightly to remove the 'seam' between the two images? any thoughts?
What version of PTGui are you using? If you are using the Pro version and the latest PTGui version it will actually fill in the sky for you. I literally paid for version 12 just for this feature; it saves so many hours that the price was more than worth it.
Thank you for the input, I upgraded tonight and already has streamlined my work flow...well worth it....thank you againWhat version of PTGui are you using? If you are using the Pro version and the latest PTGui version it will actually fill in the sky for you. I literally paid for version 12 just for this feature; it saves so many hours that the price was more than worth it.
I use PTGui all the time for both Rectilinear Panos as well as full 360 panos; below is my workflow:
- Shoot pano with 20% overlap using RAW images
I apologize for the reply to this old thread, but it addresses a couple questions I have:The Zenith hole (directly above the EVO II) will be larger than with other drones because the EVO II 6K has a 35mm FF equiv FOV vs other drones which tend to have a 24mm or 16mm FF equiv FOV. I assume that you have the EVO II 6K, I'm not sure what the FOV is for the 8K. To fix the Zenith hole you need to do a sky replacement in PhotoShop or use the blending features in PTGui. Below is a link to what this all looks like when it is complete.
Do you shoot your (360) panos manually vs Autel’s panorama mode? I tried it for the first time and noticed it doesn’t take advantage of the 30 degree upward pitch limit (pretty sure I had this checked on beforehand), resulting in an even bigger zenith hole than necessary.
If shot manually, do you just make note of your previous image composition and approximate your overlap?
Thanks for sharing your workflow. I’m also trying out PTGUI and will probably just buy the pro version for ease. Those images on your site look good.
herein2021
Well-Known Member
I apologize for the reply to this old thread, but it addresses a couple questions I have:
Do you shoot your (360) panos manually vs Autel’s panorama mode? I tried it for the first time and noticed it doesn’t take advantage of the 30 degree upward pitch limit (pretty sure I had this checked on beforehand), resulting in an even bigger zenith hole than necessary.
If shot manually, do you just make note of your previous image composition and approximate your overlap?
Thanks for sharing your workflow. I’m also trying out PTGUI and will probably just buy the pro version for ease. Those images on your site look good.
I only use manual settings and manual control; I don't trust anything auto if I can help it. I also overlap manually, picking a reference point each time before moving the camera and leaving 20-30% overlap. It is easy in cities with plenty of points of reference, it gets harder when over open ocean or something featureless like an open field, and it is nearly impossible if there are no clouds in the sky to use as reference points. I've actually had to use contrails from planes before just to get the images to stitch together.
I created this one just to see how hard it would be to manually create a pano with very few reference points to pick from.
That definitely looks like a tough one to reference, both sky and ground. Still looks like it turned out nicely though. I think I’m going to try my hand at a manual capture with some upward gimbal tilt.
herein2021
Well-Known Member
That definitely looks like a tough one to reference, both sky and ground. Still looks like it turned out nicely though. I think I’m going to try my hand at a manual capture with some upward gimbal tilt.
For the upwards tilt, I just add it as the last ring to the sphere of the 360. I start and end facing the same direction/reference point for each rotation and then I tilt the camera up for the next rotation while leaving 20-30% overlap at the bottom of the image. You also have to complete the whole image pretty quickly to reduce stitching errors caused by drone movement. The last 30% upwards tilt helps reduce the zenith hole.
Nice! That makes sense to me. Do you start with your Nadir shots then? Two of them 180 degrees apart? Also, do you happen to recall which feature in ptgui allows the addition of sky to your zenith? I don’t see it in their tutorials.
herein2021
Well-Known Member
Nice! That makes sense to me. Do you start with your Nadir shots then? Two of them 180 degrees apart? Also, do you happen to recall which feature in ptgui allows the addition of sky to your zenith? I don’t see it in their tutorials.
I first fly the drone to the spot I need and aim the camera at my main point of reference. I then keep the drone aimed in that direction and point the camera straight down for the Nadir shot. I only take one straight down, then I tilt the camera while leaving plenty of overlap with the Nadir shot. That's where the rotations begin,
When it is a sunset which requires a lot of dynamic range, I first aim at the sunset and get an exposure reading, then I turn away from the sunset or aim straight down and get that exposure reading, then attempt to balance the two so that the sunset highlights are retained as much as possible without completely crushing the shadows on the ground. In post you then need to work with the shadows and exposure before blending it all together to make it all look as natural as possible. Midday or overcast is way easier.
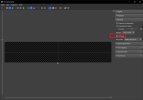
Below is a screenshot of where to find the "Fill Holes" feature. I believe that you need the pro version to use this feature.

Sounds like a solid workflow! Thanks for sharing and I’ll play with that section to try and fill the zenith. I have the pro trial until I learn it enough.
herein2021
Well-Known Member
Sounds like a solid workflow! Thanks for sharing and I’ll play with that section to try and fill the zenith. I have the pro trial until I learn it enough.
It really is fantastic software, IMO it has no equal for panos. The stitching engine really improved massively over the last few years or so. It is incredible what you can do with drone cameras and Pano stitching these days. I still remember when you had to weigh down your tripod and use a remote trigger and silent shutter just to keep from introducing vibrations into the camera, and even then it took hrs in Photoshop to fix the stitching errors.
These days I can handhold a wide angle lens and take a 3 shot pano in seconds and let PTGui figure it all out for me or fly a drone with a 10mph crosswind and still get a commercially viable pano 350ft off the ground.
Within PTGui the real power is in the manual control point process when something goes wrong with its stitching AI and it can't blend two images together. I have literally had to use waves in the ocean and wakes from boats to try to get two images to stitch and somehow PTGui figured it out after giving it a few manual control points.
Similar threads
- Replies
- 0
- Views
- 2K
- Replies
- 5
- Views
- 3K
- Replies
- 22
- Views
- 4K
- Replies
- 17
- Views
- 3K
Latest threads
-
-
-
-
-
Onocoy NTRIP. Has anyone tried this set up for RTK drone survey (photo mosaic and 3D capture and generation).
- Started by HorusQcopter
- Replies: 0


