Welcome, Autel Pilots!
Join our free Autel drone community today!
Join Us

50 MP photos not real?

Then how do you call the 1 inch 20 MPix sensor from Air2S (which by the way, wipes the floor with Nano+)?

5 Mpix or 80 Mpix?
I cannot confirm the Air 2S wiping the floor with the Nano Plus because I did not compare their pictures - and I won't trust foreign sources.
But given the similar pixel size (Air 2S: 2.4 µm, Nano Plus: 2.44 µm), Nano Plus using more than twice the pixels of the Air 2S, and Nano Plus having an RYYB sensor, I guess the Nano Plus could in fact act as the broom. But that's just guesswork until I get suitable material for comparison.
As you know I indeed did a comparison of the RAW pictures of Nano Plus and Mavic 3 (unfortunately I got no low-light shots) - and could not award a clear winner. This adds to my broom theory if I take it for granted that the Mavic 3's picture quality exceeds the one of the Air 2S.

Answering your question: Commonly, I would call the Air 2S's sensor a 20 MP sensor, technically a sensor with a pixel/detail/black-and-white resolution of 20 MP and up to 20 MP of color resolution.
 
I use both. I get garbage from Nano+ camera. I have to do a lot of manipulation to get something usable. Specs are not everything.
 
Complicated. I filed for a return. I will not fly the Nano+ anymore, is packed, waiting for the return label.
 
Answering your question: Commonly, I would call the Air 2S's sensor a 20 MP sensor, technically a sensor with a pixel/detail/black-and-white resolution of 20 MP and up to 20 MP of color resolution.

In the same reasoning, the Air2S sensor is a RG(G)B (4 subpixels just like RYYB).

So let us say that if you really want to make a subpixel comparison you compare 80 million versus 50 million sub pixels. All the 80 million subpixels are capturing light.
 
In the same reasoning, the Air2S sensor is a RG(G)B (4 subpixels just like RYYB).

So let us say that if you really want to make a subpixel comparison you compare 80 million versus 50 million sub pixels. All the 80 million subpixels are capturing light.
Not exactly.
Just imagine a sensor consisting of 20 millions of "pixels" (tiny devices detecting light, like a photodiode). These pixels can just detect brightness levels, no colors.
Such a sensor has a resolution of 20 MP, just brightness levels, thus will produce purely shades of grey.
Now you take a little square of 2 x 2 pixels, cover two of them with a green filter, the fhird one with a red filter, the last one with a blue filter. Same happens with all the remaining pixels.
You now still got 20 millions of pixels, but 10 millions of them can detect green light, 5 millions red, 5 millions blue light. But if you shine white light on them, all 20 millions produce a detailled picture of still 20 MP.
So you still got the full resolution if the light arriving is not fully monochrome green, red or blue, still 20 MP.
With monochrome green light, the resolution will decrease to 10 MP, with monochrome red or blue light to 5 MP. Only in this cases, which are quite rare, you will lose detail resolution.
Thus the detail/brightness resolution is still 20 MP. With each pixel, we exactly know it's brightness level, but we don't know if a green pixel also "saw" some blue or red light. Similar with red and blue pixels.
Thus the color resolution is just 1/4 of the sensor resolution. We know there's a special amount of light, but we can't be sure of it's color.
That's where those demosaicing algorithms come into play, which interpolate/guess/calculate the most probable color of a single pixel. Example: If two adjacent red pixels with a green one in between detected a red level of 128, it's very probable that the green pixel between them also got red light with a level of 128. If that green pixel reports 0 brightness, we know that the light hitting that green pixel had NO green components, if it reports 255 we know that there was a lot of green in that red light. And so on. Thus the different levels of light of adjacent pixels reveal more about the real color received by each single pixel. A quite complex thing needing a lot of processing power. But in the end, this results in a pretty precise color analysis, with a color resolution of up to 20 MP. It can be less, according to the subject (e. g. pure red/green/blue) colors, but usually it's pretty close to the native/effective pixel count.

Thus the Air 2S sensor still has 20 MP, the Nano Plus sensor still has 50 MP of effective pixels, with the Nano Plus sensor being able to provide more than two times more details than the Air 2S while also being able to catch more light.
So in theory, the sensor of the Nano Plus should perform much better. In practice, it further depends on lenses, electronics, light gathering/noise characteristics of the sensor and algorithms for reading and processing the data, etc.

In short: You usually get something quite close to the advertized resolution, it could be less, it could be the full resolution, with the tendency to be quite close to the native/effective pixel count.

And if you now feel a bit confused after reading all the above - me too. ;)
 
  • Like
Reactions: lifeisfun
I use both. I get garbage from Nano+ camera. I have to do a lot of manipulation to get something usable. Specs are not everything.

Another thing to keep in mind is what RAW processor are you using? The Nano is fairly new, if your RAW processor such as Lightroom hasn't yet gotten the RAW profile for the Nano's camera then your results will be sub par. DJI is much bigger and so post processing software companies always cater to the larger vendors first. If Canon or Sony releases a new RAW profile I see it in LR within a few weeks at most. If Fuji or Panasonic does the same thing it could takes months (if ever) before LR will support it.

Even to this day, over a year after the EVO II 6K was released, Lightroom still does not properly interpret the RAW files. Images are about a stop underexposed vs. what is on the histogram, the display, and what shows in FastStone, so to compensate I have to ETTR just to get proper exposure values in Lightroom.

There is deceptive marketing at countless places. Just think of that digital zoom pest, battery capacities, of course flight times, chargers charging three batteries at once, and the like. One manufacturer starts it, all others follow for not looking worse. And humans like to be deceived, also happily join the game. Just look at that five-stars reviews at Amazon for subzero products. Half of them is paid, but the other half consists of real buyers telling lies for patting themselves on the back.
In a world of liars, the ones telling the truth would be regarded as outlaws.

I do think in this scenario however Autel has stooped to a new low. I have never seen any other camera marketing materials count pixels that can't be used to create the final RAW image. I will give them the benefit of the doubt...maybe they are working on the demosaicing algorithm to translate the remaining pixels into something useful but I highly doubt it.

But I'm not sure if I should go with Normal, HDR or Log mode with the Nano, just cannot decide. So every input regarding this would be highly appreciated. ;)

If the LOG profile is as good in the Nano as it is in the EVO II 6K, then I would never use anything but the LOG profile for video. In the EVO II 6K, the LOG profile has better highlight rolloff, better DR, and I frequently shoot stock footage which I can use in multiple projects so with LOG footage I can more easily match other cameras and differently color graded projects.

Then how do you call the 1 inch 20 MPix sensor from Air2S (which by the way, wipes the floor with Nano+)?

5 Mpix or 80 Mpix?

The historical way of evaluating a sensor's resolution is by useable MP, so if the Air2S can produce 20MP RAW images then it is a 20MP sensor.
In the same reasoning, the Air2S sensor is a RG(G)B (4 subpixels just like RYYB).

So let us say that if you really want to make a subpixel comparison you compare 80 million versus 50 million sub pixels. All the 80 million subpixels are capturing light.

More is not always better, the more photosites you have for a given sensor size, the worse it performs in lowlight with all else being equal. This is why the current MILC leading cameras have lower resolution such as 12MP or 20MP. Photosite density provides diminishing returns as more are added without increasing the sensor size because photosite size has to decrease in order to increase the number of photosites.

Think of the sensor like a meshed bug screen on a window with a fixed height and width. The holes in the mesh are the photosites, and the air flowing through the mesh is like light flowing into a sensor. As you increase the number of holes in the cross-diagonal pattern of the mesh each hole has to become smaller to accommodate the increase which means that less air can flow through the mesh. A camera's sensor is the same way, the supporting circuitry around each photosite takes up space as well (like the mesh screen around each hole in the mesh) and that area surronding each photosite decreases the light reaching the photosites.

Modern lowlight cameras instead opt to go with fewer photosites which allows them to make each photosite larger (just like a window screen with just a few big holes in it) which in turn lets in more light at the expense of lower resolution.
 
Another thing to keep in mind is what RAW processor are you using? The Nano is fairly new, if your RAW processor such as Lightroom hasn't yet gotten the RAW profile for the Nano's camera then your results will be sub par. DJI is much bigger and so post processing software companies always cater to the larger vendors first. If Canon or Sony releases a new RAW profile I see it in LR within a few weeks at most. If Fuji or Panasonic does the same thing it could takes months (if ever) before LR will support it.

Even to this day, over a year after the EVO II 6K was released, Lightroom still does not properly interpret the RAW files. Images are about a stop underexposed vs. what is on the histogram, the display, and what shows in FastStone, so to compensate I have to ETTR just to get proper exposure values in Lightroom.


I do think in this scenario however Autel has stooped to a new low. I have never seen any other camera marketing materials count pixels that can't be used to create the final RAW image. I will give them the benefit of the doubt...maybe they are working on the demosaicing algorithm to translate the remaining pixels into something useful but I highly doubt it.


If the LOG profile is as good in the Nano as it is in the EVO II 6K, then I would never use anything but the LOG profile for video. In the EVO II 6K, the LOG profile has better highlight rolloff, better DR, and I frequently shoot stock footage which I can use in multiple projects so with LOG footage I can more easily match other cameras and differently color graded projects.


The historical way of evaluating a sensor's resolution is by useable MP, so if the Air2S can produce 20MP RAW images then it is a 20MP sensor.


More is not always better, the more photosites you have for a given sensor size, the worse it performs in lowlight with all else being equal. This is why the current MILC leading cameras have lower resolution such as 12MP or 20MP. Photosite density provides diminishing returns as more are added without increasing the sensor size because photosite size has to decrease in order to increase the number of photosites.

Think of the sensor like a meshed bug screen on a window with a fixed height and width. The holes in the mesh are the photosites, and the air flowing through the mesh is like light flowing into a sensor. As you increase the number of holes in the cross-diagonal pattern of the mesh each hole has to become smaller to accommodate the increase which means that less air can flow through the mesh. A camera's sensor is the same way, the supporting circuitry around each photosite takes up space as well (like the mesh screen around each hole in the mesh) and that area surronding each photosite decreases the light reaching the photosites.

Modern lowlight cameras instead opt to go with fewer photosites which allows them to make each photosite larger (just like a window screen with just a few big holes in it) which in turn lets in more light at the expense of lower resolution.
Again, thank you very much for this wealth of additional explanations!

I also know the delay with adopting new lens/sensor combinations in post-processing software. Indeed that's one of the reasons why I switched from Adobe to Affinity Photo.
I didn't run into severe problems developing DNG with AP - removing the vignetting is a push of a single slider, dewarping takes a few seconds, also color correction using "Selective Color" doesn't take ages. Of course I'd like to see a profile for automating that steps, but it's not the first point on my wish list. I am quite happy with the JPGs - although they're oversharpened and oversaturated - but that's what most people like. If I am unhappy with the JPGs, I'll use the DNGs I captured at the same time.

By the way: You also use FastStone? :D - It's been my go-to picture browser for years. Loads quickly, doesn't overflood my RAM, even does a great job with quick adjustments like adding some sharpness after resizing, also it's Auto Color feature sometimes provides great results. It's the tool I recommend everyone for starting with post-processing.
And it's part of my workflow: I browse pictures with FastStone, select the ones for further processing, then send their RAW siblings to LM4 (for real quick and dirty jobs) or AP (for detail work). A great little-big tool.

Regarding Log: I'll dig a bit deeper into this. In fact, I am just taking my first steps with video editing. I never had been a "video man", I like stills more, including astrophotography and infrared. Just bought DaVince Resolve Studio - and I am totally overwhelmed by all the features and unknown ground to explore. ;)
 
Last edited:
  • Like
Reactions: herein2021
Again, thank you very much for this wealth of additional explanations!

I also know the delay with adopting new lens/sensor combinations in post-processing software. Indeed that's one of the reasons why I switched from Adobe to Affinity Photo.
I didn't run into severe problems developing DNG with AP - removing the vignetting is a push of a single slider, dewarping takes a few seconds, also color correction using "Selective Color" doesn't take ages. Of course I'd like to see a profile for automating that steps, but it's not the first point on my wish list. I am quite happy with the JPGs - although they're oversharpened and oversaturated - but that's what most people like. If I am unhappy with the JPGs, I'll use the DNGs I captured at the same time.

By the way: You also use FastStone? :D - It's been my go-to picture browser for years. Loads quickly, doesn't overflood my RAM, even does a great job with quick adjustments like adding some sharpness after resizing, also it's Auto Color feature sometimes provides great results. It's the tool I recommend everyone for starting with post-processing.
And it's part of my workflow: I browse pictures with FastStone, select the ones for further processing, then send their RAW siblings to LM4 (for real quick and dirty jobs) or AP (for detail work). A great little-big tool.

Regarding Log: I'll dig a bit deeper into this. In fact, I am just taking my first steps with video editing. I never had been a "video man", I like stills more, including astrophotography and infrared. Just bought DaVince Resolve Studio - and I am totally overwhelmed by all the features and unknown ground to explore. ;)

I have actually never shot a single JPG from my EVO or my other cameras, RAW is definitely the way to go.

Faststone is fantastic, I use it to cull thousands of images after an event so that I can quickly send the proofs to the client. It is far better at batch processing than first importing thousands of RAWs into Lightroom and filling up its catalog vs just importing the client's selections. I also use its watermarking features to watermark the proofs, in some cases it is also better at batch processing resizing hundreds or thousands of images when I need them resized based on a specific size.

Switching Fastone to embedded JPG mode for RAW images is how I figured out that Lightroom is not properly setting the luminance values for RAWs out of the EVO II, the embedded JPG is properly exposed but LR underexposes.

Regarding Log: I'll dig a bit deeper into this. In fact, I am just taking my first steps with video editing. I never had been a "video man", I like stills more, including astrophotography and infrared. Just bought DaVince Resolve Studio - and I am totally overwhelmed by all the features and unknown ground to explore. ;)

I prefer video these days, clients pay more for video and I get hired quite often by clients who mainly need video but would like a few stills as well. In some ways video is easier than photography and in other ways photography is far easier.

You made an excellent decision with Davinci Resolve Studio, I used Premier Pro for years and hated the monthly fee and endless crashing caused by updates that I did not ask for. I switched to DR about 2yrs ago and it was the best decision I could have made. DR is great as long as you don't use Fusion....Fusion on the other hand is terrible when it comes to performance and stability; if they ever make Fusion work as good as the rest of the program it will have no equal.

These posts may help you as well as you start to branch out into video:

Why I Never Shoot Video At 24FPS

Why I Never Use CPL Filters With Drone Cameras

Why I ALWAYS use Daylight WB with Drone Cameras

Why I Never Use ND Filters With Drone Cameras
 
I have actually never shot a single JPG from my EVO or my other cameras, RAW is definitely the way to go.

Faststone is fantastic, I use it to cull thousands of images after an event so that I can quickly send the proofs to the client. It is far better at batch processing than first importing thousands of RAWs into Lightroom and filling up its catalog vs just importing the client's selections. I also use its watermarking features to watermark the proofs, in some cases it is also better at batch processing resizing hundreds or thousands of images when I need them resized based on a specific size.

Switching Fastone to embedded JPG mode for RAW images is how I figured out that Lightroom is not properly setting the luminance values for RAWs out of the EVO II, the embedded JPG is properly exposed but LR underexposes.


I prefer video these days, clients pay more for video and I get hired quite often by clients who mainly need video but would like a few stills as well. In some ways video is easier than photography and in other ways photography is far easier.

You made an excellent decision with Davinci Resolve Studio, I used Premier Pro for years and hated the monthly fee and endless crashing caused by updates that I did not ask for. I switched to DR about 2yrs ago and it was the best decision I could have made. DR is great as long as you don't use Fusion....Fusion on the other hand is terrible when it comes to performance and stability; if they ever make Fusion work as good as the rest of the program it will have no equal.

These posts may help you as well as you start to branch out into video:

Why I Never Shoot Video At 24FPS

Why I Never Use CPL Filters With Drone Cameras

Why I ALWAYS use Daylight WB with Drone Cameras

Why I Never Use ND Filters With Drone Cameras
Phew, quite some topics ...

Regarding JPG and RAW, there's that kind of hype ... "YOU NEED TO SHOOT RAW!" (In fact, I also ALWAYS shoot RAW - plus JPG.)
For anything professional or unusual (like astrophotography or infrared) we really MUST shoot RAW because it just won't work with JPGs.
For most "private" occasions, JPGs is just fine. But if people start using RAW just because someone told them it's a must for each and every purpose, things quickly get ugly.
Shitstorms because "the RAW imagine is that bad" - you've seen the countless posts in this forum. People believe RAW footage directly out of camera just has to look so much better, without any post-processing and honing, of course. I guess that's one of the reasons why many manufacturers act that reluctant allowing RAW output at all. They wish to avoid that shitstorms fanned by unaware users, posting unprocessed RAW images for "proving" the bad quality of a product. I guess the same is the case with Log profiles.
For John and Jane Doe, JPGs work just great - for all those mastery pictures taken in portrait mode, digitally zoomed, sharpness and saturation cranked up to the max, all other settings peacefully resting on auto. I sometimes call it the "Apple disease". ;)
For me, it's a question of purpose. If I just wish to send my mother a picture of some flowers in the garden, she'll get a quick JPG, same with all smartphone pictures I shoot, just isn't worth the effort. But if I try to take a photo I really like myself and which I want to exactly look like I (not my camera's algorithms) prefer, I'll go with RAW and a "real" camera.
I need to admit that processing the Nano's RAW files really is a pain in the you-know-where; color correction is quite a tedious task. But I was surprised about the potential it's RAW files provide compared with the oversharpened and strongly denoised JPGs. Unfortunately, I did not succeed with color correction of nightshots - no matter how hard I tried, I always totally failed. Let's hope for Autel showing some mercy, soon. ;)

FastStone: I always thought I was the only one on earth being in love with that tool; I just don't use anything else for the same or similar purposes like you. It's fast, direct, no hassle, no steep learning curve, even provides some more "professional" features. Just the right tool for a lot of different occasions. And free of charge.
I usually create a JPG and a RAW folder, browse the JPGs, hit "^" with the (usually few) ones I wish to process further, limit the display to marked pictures only, move FS to my second screen, launch my editing software and process my selection one by one with the RAWs. Also great for organizing pictures without going all that miles, database creations and the like as with LR. And also just the right choice for that "human" picture galleries we always find just per chance while searching for purely scientific topics. :D

Stills/videos: I never had been interested in photography or videos. My father had been a photography pro, won countless awards (waaay back in time), I just liked playing around with all the Mamyas and other high-priced devices, constantly emptied his expensive photo batteries because I loved watching the tiny lamps and numbers glowing in the viewfinder. But I never took any photos. Some years ago, I bought a small telescope, of course expected to find all that colorful and impressing nebulas from the magazines just by looking through the eyepiece. Which of course never happened. So I started to buy more and more equipment including a DSLR. Several thousand Euros later I indeed managed to get those colorful pictures, not the quality I wished for, just the quality I could pay for. I replaced the almost statutory Canon with a small Fuji (which was the best I could do) - and suddenly found photography quite interesting, especially post-processing. Nothing professional, just an occasional hobby. I never made any money with that - but I just like fiddling around with pixels, learning every day, and helping others taking better photos.
You surely know that situations: "How does it come that we use the same camera, but your pictures just look better?" or "Ah, you're using [camera model xxx], so of course your pictures automatically look better than mine." - If you then offer to swap cameras and compare the results, you're quickly running out of friends. :D
I am no pro, but I like sharing what I know. Makes you feel good if a friend drops by and proudly shows some pictures she took considering your hints, making her feel happy, inviting you for dinner - so it pays. ;)
Ahh, too much chatter ...

I started Log recording and did my first steps with color grading. I am not too pleased with the results yet, but I am very pleased with learning something new. And I am just amazed about the unbelievable wealth of features I got for paying the DaVinci Resolve Studio price. For sure I'll never need the majority, but learning is just fun. And: "Better having and not needing than needing but not having."

I read every single word of all your linked articles, just loved the EVO video.
And I kept on grinning because I found all my own points of view in your explanations, e. g. regarding frame rates, CPL and ND filters.
In another forum they were close to erecting the stake and sending me death threats for my blasphemy of seeing no sense in using ND filters for drones or for claiming that a CPL filter needs a revolving plane to work. ;)
Also your hint of using a fixed WB could really help with creating a kind of template or macro for automatic color correction of the Nano's RAWs.
And just yesterday I tried some sunset videos with the AWB (and AE) ruining just everything.
Thank you very much for that articles!
 
  • Like
Reactions: herein2021
Phew, quite some topics ...

Regarding JPG and RAW, there's that kind of hype ... "YOU NEED TO SHOOT RAW!" (In fact, I also ALWAYS shoot RAW - plus JPG.)
For anything professional or unusual (like astrophotography or infrared) we really MUST shoot RAW because it just won't work with JPGs.
For most "private" occasions, JPGs is just fine. But if people start using RAW just because someone told them it's a must for each and every purpose, things quickly get ugly.
Shitstorms because "the RAW imagine is that bad" - you've seen the countless posts in this forum. People believe RAW footage directly out of camera just has to look so much better, without any post-processing and honing, of course. I guess that's one of the reasons why many manufacturers act that reluctant allowing RAW output at all. They wish to avoid that shitstorms fanned by unaware users, posting unprocessed RAW images for "proving" the bad quality of a product. I guess the same is the case with Log profiles.
For John and Jane Doe, JPGs work just great - for all those mastery pictures taken in portrait mode, digitally zoomed, sharpness and saturation cranked up to the max, all other settings peacefully resting on auto. I sometimes call it the "Apple disease". ;)
For me, it's a question of purpose. If I just wish to send my mother a picture of some flowers in the garden, she'll get a quick JPG, same with all smartphone pictures I shoot, just isn't worth the effort. But if I try to take a photo I really like myself and which I want to exactly look like I (not my camera's algorithms) prefer, I'll go with RAW and a "real" camera.
I need to admit that processing the Nano's RAW files really is a pain in the you-know-where; color correction is quite a tedious task. But I was surprised about the potential it's RAW files provide compared with the oversharpened and strongly denoised JPGs. Unfortunately, I did not succeed with color correction of nightshots - no matter how hard I tried, I always totally failed. Let's hope for Autel showing some mercy, soon. ;)

FastStone: I always thought I was the only one on earth being in love with that tool; I just don't use anything else for the same or similar purposes like you. It's fast, direct, no hassle, no steep learning curve, even provides some more "professional" features. Just the right tool for a lot of different occasions. And free of charge.
I usually create a JPG and a RAW folder, browse the JPGs, hit "^" with the (usually few) ones I wish to process further, limit the display to marked pictures only, move FS to my second screen, launch my editing software and process my selection one by one with the RAWs. Also great for organizing pictures without going all that miles, database creations and the like as with LR. And also just the right choice for that "human" picture galleries we always find just per chance while searching for purely scientific topics. :D

Stills/videos: I never had been interested in photography or videos. My father had been a photography pro, won countless awards (waaay back in time), I just liked playing around with all the Mamyas and other high-priced devices, constantly emptied his expensive photo batteries because I loved watching the tiny lamps and numbers glowing in the viewfinder. But I never took any photos. Some years ago, I bought a small telescope, of course expected to find all that colorful and impressing nebulas from the magazines just by looking through the eyepiece. Which of course never happened. So I started to buy more and more equipment including a DSLR. Several thousand Euros later I indeed managed to get those colorful pictures, not the quality I wished for, just the quality I could pay for. I replaced the almost statutory Canon with a small Fuji (which was the best I could do) - and suddenly found photography quite interesting, especially post-processing. Nothing professional, just an occasional hobby. I never made any money with that - but I just like fiddling around with pixels, learning every day, and helping others taking better photos.
You surely know that situations: "How does it come that we use the same camera, but your pictures just look better?" or "Ah, you're using [camera model xxx], so of course your pictures automatically look better than mine." - If you then offer to swap cameras and compare the results, you're quickly running out of friends. :D
I am no pro, but I like sharing what I know. Makes you feel good if a friend drops by and proudly shows some pictures she took considering your hints, making her feel happy, inviting you for dinner - so it pays. ;)
Ahh, too much chatter ...

I started Log recording and did my first steps with color grading. I am not too pleased with the results yet, but I am very pleased with learning something new. And I am just amazed about the unbelievable wealth of features I got for paying the DaVinci Resolve Studio price. For sure I'll never need the majority, but learning is just fun. And: "Better having and not needing than needing but not having."

I read every single word of all your linked articles, just loved the EVO video.
And I kept on grinning because I found all my own points of view in your explanations, e. g. regarding frame rates, CPL and ND filters.
In another forum they were close to erecting the stake and sending me death threats for my blasphemy of seeing no sense in using ND filters for drones or for claiming that a CPL filter needs a revolving plane to work. ;)
Also your hint of using a fixed WB could really help with creating a kind of template or macro for automatic color correction of the Nano's RAWs.
And just yesterday I tried some sunset videos with the AWB (and AE) ruining just everything.
Thank you very much for that articles!

I guess you could say I have shot professionally so long that I am a bit jaded, so the only time I am shooting now is professionally hence RAWs only. For any user not planning on post processing, setting the camera to a natural profile and JPG will usually suffice. Color correction in DR for video will literally take you 3 seconds once you get used to it. I follow the same workflow on the first clip, then clone the grade to the remaining clips.

In DR create 3 nodes. Node 1 is for primaries grading, Node 2 is for curves, and Node 3 is for false color. Disable Node 3 and apply a false color LUT to it. for Node 1 enable the Wave Form monitor and exand the waveform using the primaries wheels until it just touches off the tops and bottoms of the display. Add 1.2 contrast and whatever saturation you prefer. Base color grade is done. Tweak the curves a bit in Node 2 if you want to fine tune the contrast. Rec.709 color grade is now done.

If you have people in the image and want to properly expose them, then enable Node 3 and use false color to properly expose them then disable Node3. Clone the grade to all of the clips then tweak Node one for each clip to prevent WFM clipping. Once the entire project is done, add an adjustment layer over the whole project and apply a creative LUT or create your own creative grade. Just dragging the lows towards blue will immediately give the project a "cinematic" look, and moving up the bottom of the exposure in curves will immediately give the project a "matte/promist" look.

For my cinema cameras a little more work is involved especially with mixed lighting scenarios, camera color matching, etc., but for drones its very easy.

I have never tried Astrophotography or wildlife. Both of those pursuits are very expensive even for the photography world (due to the cost of the lenses) will little financial benefit. I did try once to take a picture of the full moon with my 70-200 (my longest lens) and of course it looked awful.
 
  • Like
Reactions: Landey
You definitely know video in DR like the back of your hand. Personally though I've always hated the look of making blacks artificially lighter. I suppose it may be a different story now that more people have OLED displays, but as a photographer, it just looks washed out to me. I've always been a fan of high contrast images, but not if the scene won't take to it.

In regards to the Nano+ in general. I really wanted to already have one in my hands, but with this kind of launch I just can't see myself investing in it. Possibly even not in this company. If you're going to release a product that people have to pay for, you'd better give it a full 100% effort to make all your promised goals. More importantly though, you'd better support the damn thing after you release it.
Sure, they've released some patches, but where is 10bit? Where is a proper raw colour profile? They should be able to release one of their own that people can manually add to programs like Photoshop.
If they can get the jpg's to look right, they know how to correct for the sensor. ><

It doesn't exactly give me a lot of confidence in Autel.
 
  • Like
Reactions: herein2021
I guess you could say I have shot professionally so long that I am a bit jaded, so the only time I am shooting now is professionally hence RAWs only. For any user not planning on post processing, setting the camera to a natural profile and JPG will usually suffice. Color correction in DR for video will literally take you 3 seconds once you get used to it. I follow the same workflow on the first clip, then clone the grade to the remaining clips.

In DR create 3 nodes. Node 1 is for primaries grading, Node 2 is for curves, and Node 3 is for false color. Disable Node 3 and apply a false color LUT to it. for Node 1 enable the Wave Form monitor and exand the waveform using the primaries wheels until it just touches off the tops and bottoms of the display. Add 1.2 contrast and whatever saturation you prefer. Base color grade is done. Tweak the curves a bit in Node 2 if you want to fine tune the contrast. Rec.709 color grade is now done.

If you have people in the image and want to properly expose them, then enable Node 3 and use false color to properly expose them then disable Node3. Clone the grade to all of the clips then tweak Node one for each clip to prevent WFM clipping. Once the entire project is done, add an adjustment layer over the whole project and apply a creative LUT or create your own creative grade. Just dragging the lows towards blue will immediately give the project a "cinematic" look, and moving up the bottom of the exposure in curves will immediately give the project a "matte/promist" look.

For my cinema cameras a little more work is involved especially with mixed lighting scenarios, camera color matching, etc., but for drones its very easy.

I have never tried Astrophotography or wildlife. Both of those pursuits are very expensive even for the photography world (due to the cost of the lenses) will little financial benefit. I did try once to take a picture of the full moon with my 70-200 (my longest lens) and of course it looked awful.
I'll follow all that hints! After all that Casey Faris input I spent hours with, a second opinion seems to be a very solid way to go.
May I abuse your experience a bit? Did you see my thread about that flickering color/brightness issues in the lower left part of the picture, very prominent with HDR videos, but also present with other profiles?
I managed to lower the presence of that nagging effect a bit with some of DAS's tools, but I don't get fully rid of it. Maybe it's even a sensor fault of my Nano. Thus I'd be grateful for any hints regarding that issue.
Update: Ah, never mind! Just figured it out myself. Noise reduction applied using a mask ("window") to the problematic area plus some minor tweaks did the job. Problem solved.


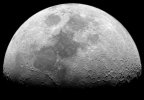
Regarding moon and regular lenses: Almost impossible to achieve results making you happy. You need a very good "seeing" (when stars don't seem to 'sparkle'), short exposure, a "lucky shot" because temperature differences of the atmosphere in different altitudes cause quickly changing areas of unsharpness, low ISO and countless sharpness runs using different levels of unsharp mask or high pass. But still, those shots will never come out great or anywhere near great. You'll always need some more focal length and aperture. A cheap Maksutov could do a better job than a regular lens.
Just in case you should ever wish to try the astro way. ;)

K_Merged_cor_denoise__resharp.jpg
EOS 750D, ISO 400, 1/60 s, focal length 750 mm, aperture 150 mm - unfortunately taken without field flattener, thus the peripheral parts aren't sharp.
 
Last edited:
  • Like
Reactions: herein2021
One quite interesting finding: If I add a Nano's DNG to the media pool of DaVinci Resolve and put it in the timeline, all colors are correct!
Thus it seems like all the information needed are already in the DNG.
 
You definitely know video in DR like the back of your hand. Personally though I've always hated the look of making blacks artificially lighter. I suppose it may be a different story now that more people have OLED displays, but as a photographer, it just looks washed out to me. I've always been a fan of high contrast images, but not if the scene won't take to it.

In regards to the Nano+ in general. I really wanted to already have one in my hands, but with this kind of launch I just can't see myself investing in it. Possibly even not in this company. If you're going to release a product that people have to pay for, you'd better give it a full 100% effort to make all your promised goals. More importantly though, you'd better support the damn thing after you release it.
Sure, they've released some patches, but where is 10bit? Where is a proper raw colour profile? They should be able to release one of their own that people can manually add to programs like Photoshop.
If they can get the jpg's to look right, they know how to correct for the sensor. ><

It doesn't exactly give me a lot of confidence in Autel.

DR can still do a lot more than I do with it, I only use it for video editing, basic color grading, etc. and I am not ashamed to admit when I want to do something new with it I am on YouTube learning how just like everyone else. Entire Hollywood movies are edited with it using far more advanced techniques than I am familiar with. That's what's great about it, you will never outgrow it. One of the biggest problems with DR always has been fewer YT people create tutorials about it because most of them use Premier Pro. That has been changing recently, but for advanced special effects, motion graphics, etc. it can still be hard to find good tutorial content.

I 100% agree with you on the blacks; I don't understand people cranking the ISO at night just to make the image brighter. The ISO 10000 tests on YouTube are ridiculous to me. Blacks should be black, not shades of grey, if there truly is no light then the image will simply be underexposed, no way around that in my opinion.

However, regardless of my opinion, the matte / promist look is popular these days, especially in the beauty/fashion and wedding industries. What the matte look does is reduces contrast in the lows which hides skin blemishes and makes people's skin look smoother than it probably is. I remember years ago when actors/actresses complained that 4K was too sharp and made them look worse on the big screen. The industry's response apparently was to reduce contrast and turn all of that expensive 4K/6K/8K of sharpness back into 1080P levels via filters and color grading.


I'll follow all that hints! After all that Casey Faris input I spent hours with, a second opinion seems to be a very solid way to go.
May I abuse your experience a bit? Did you see my thread about that flickering color/brightness issues in the lower left part of the picture, very prominent with HDR videos, but also present with other profiles?
I managed to lower the presence of that nagging effect a bit with some of DAS's tools, but I don't get fully rid of it. Maybe it's even a sensor fault of my Nano. Thus I'd be grateful for any hints regarding that issue.
Update: Ah, never mind! Just figured it out myself. Noise reduction applied using a mask ("window") to the problematic area plus some minor tweaks did the job. Problem solved.

I have watched hours of Casey Faris' content myself, when I need a technique that I am not familiar with, his channel is one of the first ones that I check.

I did not see your post about the flickering color issues, even though you may have fixed it, that does not mean something is not wrong with your sensor, you should not have to apply a fix to a portion of an image for a reason like that. If it does it all the time it could very well be a sensor issue.

Regarding moon and regular lenses: Almost impossible to achieve results making you happy. You need a very good "seeing" (when stars don't seem to 'sparkle'), short exposure, a "lucky shot" because temperature differences of the atmosphere in different altitudes cause quickly changing areas of unsharpness, low ISO and countless sharpness runs using different levels of unsharp mask or high pass. But still, those shots will never come out great or anywhere near great. You'll always need some more focal length and aperture. A cheap Maksutov could do a better job than a regular lens.
Just in case you should ever wish to try the astro way. ;)

View attachment 13830
EOS 750D, ISO 400, 1/60 s, focal length 750 mm, aperture 150 mm - unfortunately taken without field flattener, thus the peripheral parts aren't sharp.

That is an incredible shot of the moon, I had never even heard of a field flattener so I had to look that one up, I would have thought it is just corner softness of the lens, but it makes sense it is needed for astrophotography after reading what it does.

One quite interesting finding: If I add a Nano's DNG to the media pool of DaVinci Resolve and put it in the timeline, all colors are correct!
Thus it seems like all the information needed are already in the DNG.

Yes DR does natively support the DNG format which is also the raw format for some cinema cameras. I have never used it that way to edit images since I am more familiar with editing images in LR, but I suppose you could actually use DR to fully edit a raw image. BTW, DR 18 Beta was just released, I am currently reading up on how to use the new features.
 
Interesting indeed, but my guess is that what you're seeing is a jpg preview that's built into the raw file. I can't say for sure that DNG files have it, but I do know that Canon raw files do.

If it is the actual raw image, I'd be sending that info the both Adobe and Autel and asking them, "WTF?"

One quite interesting finding: If I add a Nano's DNG to the media pool of DaVinci Resolve and put it in the timeline, all colors are correct!
Thus it seems like all the information needed are already in the DNG.
 
YT is a must if you don't want to drop 10-20K going to school somewhere. I also like LinkedIn Learning but I find both are needed. YT has the most up to date stuff, and people doing videos of more creative things where as LinkedIn is more like an online self study course. Better overall presentation usually, but sticks to the norms.

DR can still do a lot more than I do with it, I only use it for video editing, basic color grading, etc. and I am not ashamed to admit when I want to do something new with it I am on YouTube learning how just like everyone else. Entire Hollywood movies are edited with it using far more advanced techniques than I am familiar with. That's what's great about it, you will never outgrow it. One of the biggest problems with DR always has been fewer YT people create tutorials about it because most of them use Premier Pro. That has been changing recently, but for advanced special effects, motion graphics, etc. it can still be hard to find good tutorial content.

I 100% agree with you on the blacks; I don't understand people cranking the ISO at night just to make the image brighter. The ISO 10000 tests on YouTube are ridiculous to me. Blacks should be black, not shades of grey, if there truly is no light then the image will simply be underexposed, no way around that in my opinion.

However, regardless of my opinion, the matte / promist look is popular these days, especially in the beauty/fashion and wedding industries. What the matte look does is reduces contrast in the lows which hides skin blemishes and makes people's skin look smoother than it probably is. I remember years ago when actors/actresses complained that 4K was too sharp and made them look worse on the big screen. The industry's response apparently was to reduce contrast and turn all of that expensive 4K/6K/8K of sharpness back into 1080P levels via filters and color grading.
 
Interesting indeed, but my guess is that what you're seeing is a jpg preview that's built into the raw file. I can't say for sure that DNG files have it, but I do know that Canon raw files do.

If it is the actual raw image, I'd be sending that info the both Adobe and Autel and asking them, "WTF?"

I checked just to be sure (since I do not use DR this way), but DR is in fact reading the RAW data. In the file info it is treating it as a CinemaDNG file and in the metadata it includes the WB and other raw information that it would have no access to as a JPG.

You are correct though, the DNGs do include embedded JPGs, that's what I use in FastStone since it does not natively support the Autel DNG format.
 

Latest threads

Members online

Forum statistics

Threads
11,281
Messages
102,957
Members
9,880
Latest member
chuckster58