Welcome, Autel Pilots!
Join our free Autel drone community today!
Join Us

Photogrammetry with Evo and Evo II

Of course, that is the main argument against photogrammetry.... It's not great for all applications.... because like you said, the results you get back are highly unoptimized and just full of polygons... when i was a game developer, it was used pretty limitedly. It often was more time consuming to optimize a photogrammetry project then it was to just design the model from scratch by hand

It's not a push button solution for games, and you have to commit to finding a way to integrate photogrammetry workflows into your pipeline to get the best use of it. Which means creating a process for:
  • High-Quality Captures (if you don't get good data you're not going to get good results)
  • Ingesting and processing, including what's the right resolution of data to use and how to properly decimate / crunch down the data to polygons and texture maps.
  • Rapid prototyping (which pieces do you want to use where).
  • Combining photogrammetry with art direction and assets development (Zbrush / Substance Painter / etc)
 
Hello Everyone,

Here is some small tips to make photogrammetry with your Evo drones.

Most of us enjoy using our drones with automated missions with 3rd party apps (if you use other brand drones) or use the Mission area in the Explorer app. I have found that if you perform the mission manually, you can achieve better results in your photogrammetry.

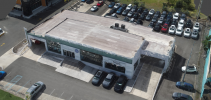
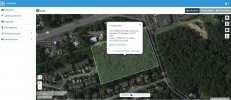
Here is the one I did yesterday for a refurbishing project I will be doing in the next few months.
View attachment 7711

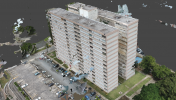
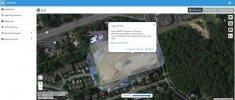
For best results, I recommend that you make a zig zag pattern above the building and after you have finished doing so, do another zig zag pattern, but in the other direction. For clarification, do the zig zag from north to south, then from east to west. Once you have completed this pattern, do a low fly by taking photos around the sides of the building. Remember to keep a bit of distance, so the building doesn't block satellites, thus making the photos lose their location.

View attachment 7712

***** IMPORTANT *******

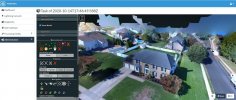
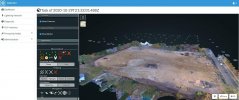
Always try to keep a 70% overlap or better for best results. I did not follow this rule in the low photos and I lost a bit of resolution in the end results.

View attachment 7713

For processing, I have found that Agisoft Metashape has been the easiest for me to process these projects locally.

If you have any questions, please do not hesitate to ask in the posts below.
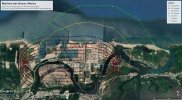
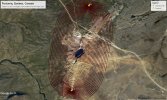
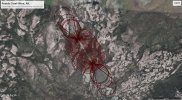
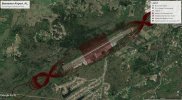
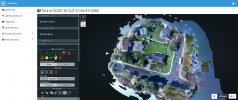
Ansia: you may also want to explore using curved flight lines to a) add a much more diverse view perspective, b) handle lighting situations a little more flexibly, and c) help mitigate the Structure-from-Motion elevation doming/dishing error. I've attached some examples of gently curved, convergent, non-traditional (non-linear/non-parallel drone flight paths for your consideration.
 

Attachments

  • Maritima Dos Bocas Flight Mission with Curved Trajectories 102020.jpg
    Maritima Dos Bocas Flight Mission with Curved Trajectories 102020.jpg
    906.3 KB · Views: 25
  • Purtuniq - Quebec - Canada Image.jpg
    Purtuniq - Quebec - Canada Image.jpg
    956.1 KB · Views: 24
  • Peeble Creek Mine Second TEST 021819 Image.jpg
    Peeble Creek Mine Second TEST 021819 Image.jpg
    1.1 MB · Views: 23
  • Bessemer Airport POINTS 021619.jpg
    Bessemer Airport POINTS 021619.jpg
    962.8 KB · Views: 26
  • Like
Reactions: Eagle928
Ansia: you may also want to explore using curved flight lines to a) add a much more diverse view perspective, b) handle lighting situations a little more flexibly, and c) help mitigate the Structure-from-Motion elevation doming/dishing error. I've attached some examples of gently curved, convergent, non-traditional (non-linear/non-parallel drone flight paths for your consideration.
I've seen you have been posting these all over the forum. I do use curve, but to get more details at lower altitudes.
 
hello there Ansia
this is very interesting. Its something i wouldnt mind having a look at so i could then show to students.
with your software, is it just a case of loading up all of the pics and the program will collate it all and produce the model, or do i need to be doing more?

I understand that i should run grid pattern twice over subject. But for the lower pics, do i need to do anything special with these other than ensuring adequate overlap.
are there any video instructions you would recommend?

thanks mate
Jack


I am sure there are plenty of videos on how to do it on Youtube, but I learned by reading the instructions from Agisoft's webpage. What you want to do is a grid pattern with a 70-80% overlap. This will ensure accuracy and better results in the rendering. When you do the grid pattern, make sure you have plenty of satellites throughout the flight. Having satellites locked variation within the flight may produce poor results. Basically the program takes care of aligning them and creating the model. If the program encounters a problem early on, it will let you know where the problem is and give you the option of align the photo manually or delete it. If you are interested in a detailed 3D model, I suggest a criss cross grid pattern with the camera tilted into a 20-30 degree angle (looking down is 0 degrees) for more details of the structures. Usually a 100' height will render an ok model, but for better details, lower heights render more resolution. I recently did a huge parking lot for an asphalt replacement project I am working on. I did the flight at 50' and I found an old rope lying on the floor. The model is so detailed, you can actually see the strands in the finished photogrammetry.
 
Fantastic. I’m interested in doing a school with multiple building. Maybe I should try something simpler first?
I have a read through Agisofts webpage. Thanks for your advice
 
Fantastic. I’m interested in doing a school with multiple building. Maybe I should try something simpler first?
I have a read through Agisofts webpage. Thanks for your advice
Just do a simple building with little features first as trial and error. Your house should be simple enough.

1604075281961.png


Then move to more complex flights. I apologize for the floating objects. I still need to clean it up.

1604075370886.png
 
  • Like
Reactions: Tufargon
So I'm very much a novice at this, but wanted to dip my toes into modeling, but didn't want to spent much $$ unless I did it as part of a business or was being paid. I decided to download free, or near free modeling software (Web ODM). I realize there are more comprehensive and simpler programs available, but basically with zero training, my first two attempts were very simple, but not bad. Just trying to use this drone (EVO 1) in as many ways as I can to expand my enjoyment of flying and using it. received_826481684848660.jpegreceived_364232261494281.jpegreceived_738249303433276.jpegreceived_740488829872188.jpegreceived_380660202984812.jpeg
 
Just do a simple building with little features first as trial and error. Your house should be simple enough.

View attachment 8896


Then move to more complex flights. I apologize for the floating objects. I still need to clean it up.

View attachment 8897
So just confirming, I don’t need to upload pics in any order? The software will allocate their position from data in pic file?

cheers
 
The mission planner needs a “save as” function. Once I have saved a flight plan, it would be very handy to just move the grid to a different part of map with all same settings and ‘save as’ as new plan, instead of having to start a new plan from scratch.
The mission I have will need 3 plans as I’m trying to keep flight time to around 30mins for each bit
 
  • Like
Reactions: Ansia
I suck at chunk merging and marking points in alignment. I dread running out of battery in the middle of a mission, so I don't have to do it.
I saw a vid that claims the craft will land for battery change and then continue. Have you tried this?
also, what speed do you recommend.
‘thanks again
 
So just confirming, I don’t need to upload pics in any order? The software will allocate their position from data in pic file?

cheers
Correct.

Do you use GCP’s
I have no idea what GPC is, so I'll answer no.

I saw a vid that claims the craft will land for battery change and then continue. Have you tried this?
also, what speed do you recommend.
‘thanks again
I have and it does. At least with the Evo 1. I suggest you read the wind. Going slow prevents the photos to get motion blur, then again if there is to much wind, you will find your drone standing still or going really slow due to headwind.
 
The mission planner needs a “save as” function. Once I have saved a flight plan, it would be very handy to just move the grid to a different part of map with all same settings and ‘save as’ as new plan, instead of having to start a new plan from scratch.
The mission I have will need 3 plans as I’m trying to keep flight time to around 30mins for each bit

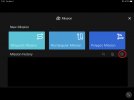
I was in the same boat as you wanting a Save As option but found that there is a way to copy a mission and then edit it to create a new mission.

In the Mission screen click the button to the far right. Then select the mission to copy and press the copy button in the top left.
 

Attachments

  • IMG_0067.jpg
    IMG_0067.jpg
    55.8 KB · Views: 13
  • IMG_0068.jpg
    IMG_0068.jpg
    30.5 KB · Views: 13
  • Like
Reactions: Tobimashou
No problem. The only way that I found to change the name of the new mission was to very slightly change the mission area and then change it back. Then hit the big Autel A in the upper left or Mission to the right of it. You'll get an option then to rename and save. Pretty lame as I'd rather see just a Save As option.
 
Hello Everyone,

Here is some small tips to make photogrammetry with your Evo drones.

Most of us enjoy using our drones with automated missions with 3rd party apps (if you use other brand drones) or use the Mission area in the Explorer app. I have found that if you perform the mission manually, you can achieve better results in your photogrammetry.

Here is the one I did yesterday for a refurbishing project I will be doing in the next few months.
View attachment 7711

For best results, I recommend that you make a zig zag pattern above the building and after you have finished doing so, do another zig zag pattern, but in the other direction. For clarification, do the zig zag from north to south, then from east to west. Once you have completed this pattern, do a low fly by taking photos around the sides of the building. Remember to keep a bit of distance, so the building doesn't block satellites, thus making the photos lose their location.

View attachment 7712

***** IMPORTANT *******

Always try to keep a 70% overlap or better for best results. I did not follow this rule in the low photos and I lost a bit of resolution in the end results.

View attachment 7713

For processing, I have found that Agisoft Metashape has been the easiest for me to process these projects locally.

If you have any questions, please do not hesitate to ask in the posts below.

Excelent my friend, whats is the speed, did you use?, do you know if i can use with the software mission planner?, to obtain hover when the drone take a photo
 
I know this is a late reply to this topic, but I’m starting to shoot for a solar company. They want pictures of roofs where the bottom of the image is directly South. They also want measurements of the roof so they can superimpose the solar panels in the roof at the right scale. Would photogrammetry be helpful for this or would that be overkill?
 
Is there any good software to automate the photo capture part of the photogrammetry process that will work on a nano+ ?

It looks like pix4d does not support my nano+, I didn't see anything in Autel sky. Drone deploy doesn't seem to support it.
 
i just don't seem to get the whole point of Photogrametry... i have a 4k vid of the same image, what more can somebody want??
The 4K vid of the image is only the view of the camera at that frame, granted move the camera around the image and you can change your view, however your view is limited to what the video camera captured. With photogrammetry your view is based on what you want to see and see from at a random time and vantage point given you have the images to create the model. Besides still images, there are some platforms that can also ingest video to create the models. Whats it used for? Engineering, Architecture, Construction and other BIM related items, CG and 3D/VR tours, training, education, much more. Its just another step on the path from still photo to motion / video to color to SD to HD to UHD to 360 (still/video) among other variations and use cases.
 

Latest threads

Members online

No members online now.

Forum statistics

Threads
11,278
Messages
102,939
Members
9,873
Latest member
kwoody