Welcome, Autel Pilots!
Join our free Autel drone community today!
Join Us

New EVO 2 Pro 6K Owner Here - Professional Videographer / Photographer

As a new member here as well as a new E2P owner, I am in the same boat as you were back in January. How have your experiences panned out for you in these past few months?

Welcome to the Autel family. I did a complete write up on my experiences in this thread. And have kept the thread updated as I continue using the Autel. There is plenty to like, but of course the EVO II is not perfect, but long story short...I have decided it is the best consumer / prosumer grade drone money can buy at the moment.
 
On the hunt for the best quality settings. So far I have more questions than answers.
For one, coming from theDJI M2P, when shooting in Log it was 10bit.
Now I guess, shooting in Log is not necessarily 10bit. At least I don't think it is. As I was able to shoot log in 6k. Later in post I found the EVO LUT to be not so impressive, compared to the standard color profile in 6k.
Please take a look at my post back early in this thread. 10bit log is available at 4k 30p, 24p. Not 4k 60p.
At 1080 60p you can get 10bit log.
I agree, the LUT is not very good.
 
On the hunt for the best quality settings. So far I have more questions than answers.
For one, coming from theDJI M2P, when shooting in Log it was 10bit.
Now I guess, shooting in Log is not necessarily 10bit. At least I don't think it is. As I was able to shoot log in 6k. Later in post I found the EVO LUT to be not so impressive, compared to the standard color profile in 6k.

Congrats on joining the Autel system, this post may help you find the pros and cons of the new system faster than I did. After many professional jobs and many hours in the air the best settings are actually pretty easy to achieve for me.

The biggest thing you need to do to get the best settings is to use the histogram like a WFM since they do not offer an actual WFM. The exposure meter is useless for LOG video and close to useless for photography as well. ETTR until the highlights are close but not touching the upper edge of the histogram. My video camera settings are:

DAYLIGHT
Color Profile: LOG
Aperture: F11
Shutter: Whatever is needed
ISO: 100
WB: Daylight
Framerate: 30FPS

NIGHT
Color Profile: LOG
Aperture: F2.8
Shutter: 1/30s
ISO: 800
WB: 3600K
Framerate: 30FPS

In case you missed it:

Why I ALWAYS use Daylight WB with Drone Cameras

Why I NEVER Shoot Video at 24FPS

COLOR GRADING

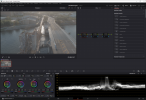
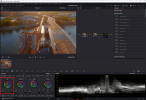
As far as color grading goes, I never use LUTS for the primaries grade. I always hand grade during the primaries stage to the Rec.709 standard then apply a creative grade or possibly a LUT over the footage after the primaries grade. I use Davinci Resolve for grading and the grade typically only takes seconds per clip. I load up the selected clip in Davinci Resolve and use the WFM to expand the DR, then add saturation, contrast, and sometimes tweak the curves. From there I just clone the grade to the rest of the like clips.

I shoot a lot of stock footage and sometimes share footage between projects so shooting and grading the way that I do lets me match my cinema cameras, drone cameras, and underwater cameras in post to give my projects a uniform look and feel. The LOG curve for the EVO II is better than anything I got out of the DJI. Below are sample before and after clips in Davinci Resolve.

Ungraded.PNG


Lift-Adjusted.png
 
Last edited:
  • Like
Reactions: edgardcafe
Please take a look at my post back early in this thread. 10bit log is available at 4k 30p, 24p. Not 4k 60p.
At 1080 60p you can get 10bit log.
I agree, the LUT is not very good

Please take a look at my post back early in this thread. 10bit log is available at 4k 30p, 24p. Not 4k 60p.
At 1080 60p you can get 10bit log.
I agree, the LUT is not very good.
I wrote "6K" not "60". So I shot Log in 6K, not 4k 60p.
Coming from DJI I was just surprised. Log is always 10bit there, but not with Autel. Log can be 8bit as well.

Today I shot with the required settings and got 10 bit, as you can see.

Type: MPEG Movie
File Size: 2,02 GB
Image Size: 3840 x 2160
Frame Rate: 30,00
Total Duration: 00:02:45:11
Pixel Aspect Ratio: 1,0
Alpha: None
Video Codec Type: HEVC 10 bit 4:2:0 (Full Range)

But I am less than thrilled with the results. The LUT is horrendous, still flat and the colours completely off. And it doesn´t matter whether it is 6K (8bit) or 4K (10bit), both are flat and difficult to work with. The DJI experience was much better in that respect.
 
Congrats on joining the Autel system, this post may help you find the pros and cons of the new system faster than I did. After many professional jobs and many hours in the air the best settings are actually pretty easy to achieve for me.

The biggest thing you need to do to get the best settings is to use the histogram like a WFM since they do not offer an actual WFM. The exposure meter is useless for LOG video and close to useless for photography as well. ETTR until the highlights are close but not touching the upper edge of the histogram. My video camera settings are:

DAYLIGHT
Color Profile: LOG
Aperture: F11
Shutter: Whatever is needed
ISO: 100
WB: Daylight
Framerate: 30FPS

NIGHT
Color Profile: LOG
Aperture: F2.8
Shutter: 1/30s
ISO: 800
WB: Daylight
Framerate: 30FPS

In case you missed it:

Why I ALWAYS use Daylight WB with Drone Cameras

Why I NEVER Shoot Video at 24FPS

COLOR GRADING

As far as color grading goes, I never use LUTS for the primaries grade. I always hand grade during the primaries stage to the Rec.709 standard then apply a creative grade or possibly a LUT over the footage after the primaries grade. I use Davinci Resolve for grading and the grade typically only takes seconds per clip. I load up the selected clip in Davinci Resolve and use the WFM to expand the DR, then add saturation, contrast, and sometimes tweak the curves. From there I just clone the grade to the rest of the like clips.

I shoot a lot of stock footage and sometimes share footage between projects so shooting and grading the way that I do lets me match my cinema cameras, drone cameras, and underwater cameras in post to give my projects a uniform look and feel. The LOG curve for the EVO II is better than anything I got out of the DJI. Below are sample before and after clips in Davinci Resolve.

View attachment 13135
 
You seem very competent when it comes to color grading. I guess I am not nearly as experienced as you are, plus I use Premiere. I would never dare to color grade a Log first hand. With DJI I used the LUT and fiddled around afterwards, which was seldom needed, as the results were already great.
Like I said befor the LUT ´s are somewhat dissapointing to me, since I haven´t figured it out yet. The LOG profile in 6K (8bit) as well as 4K (10bit) LUTs were equally a bummer.
I am not even sure whether I want to color grade each individual clip. I would rather apply ONE Adjustment Layer to the whole project, whit little adjustments.
Anyways, your settings are not ideal either:
Daylight:
Aperture: F11 This is not the best setting. As most cameras are the sharpest around f4.5. With the EVO 8K in higher aperture values I noticed a distinct softness with everything except dead center and I suspect the same is true for the 6K Pro. That is what filters are for.
Shutter: Whatever is needed This is against the 180-degree rule and may result in unrealistic motion blur, or the lack thereoff.
ISO: 100 I also try to use ISO 100. but someone on youtube, I guess droneXfactor was his name, said I should be on 200 to "push" the sensor, at least while shooting in log.
 
As it stands right now, I might do away with the LOG color profile altogether for 2 reasons:
- The LUTs or the profile is bad. Either way the results are not that promising.
- The control picture while flying is really affected by the flat picture. DJI had a very useful Pre-Lut button, so you could see a colorful picture even while filming in Log, which as a big advandtage when steering your drone. Well, Autel does not.

This is very disheartening since I do have a very powerful Computer and was hoping to unlock the potential of a 10 bit Log profile. But I explains the fact that there is very little graded stuff on youtube, most people use the 6K, no Log.
 
You seem very competent when it comes to color grading. I guess I am not nearly as experienced as you are, plus I use Premiere. I would never dare to color grade a Log first hand. With DJI I used the LUT and fiddled around afterwards, which was seldom needed, as the results were already great.
Like I said befor the LUT ´s are somewhat dissapointing to me, since I haven´t figured it out yet. The LOG profile in 6K (8bit) as well as 4K (10bit) LUTs were equally a bummer.
I am not even sure whether I want to color grade each individual clip. I would rather apply ONE Adjustment Layer to the whole project, whit little adjustments.

YouTube and other information sources will make you think hand primaries grading without using a LUT is a big mysterious process that only Hollywood colorists can perform. To be honest with you I started out that way as well, but I got tired of sub-par results and buying or trying LUT packs for my cameras so I spent just a few hours watching Davinci Resolve's color grading videos (they are excellent and free) and I have never needed a primaries LUT again. I will admit, certain LOG profiles such as CLOG2 are very challenging without the official LUT but it can still be done. LUT packs are still useful for creative grades and I do use them for that but not the primaries grade.

BTW I used Premier for years before getting tired of their endless subscription fees and switched to Davinci Resolve (best decision I've made in a long time). It took about a week to get to where I could edit entire projects with it and I've never looked back.

In Davinci Resolve I don't really grade each clip; I create a grade for the first clip then just copy it to like clips. Notice I said "like clips" not all clips. I typically have a mixture of footage from many different cameras, an adjustment layer would break the footage from the other cameras. Also, even when grading just the drone footage portion, the exposure could vary between clips. One might have been shot in Hawaii and the other in Virginia, on different days and in different lighting conditions; an adjustment layer would break those clips as well.

Even clips from the same drone from the same day with the same camera settings could be different. The sun could go behind a cloud, the drone could be pointed away from the sun then right at the sunset, etc....all of those scenarios need to be accounted for in the grade.

Also, I noticed you are really focusing on 10bit vs 8bit, when properly exposed and lightly graded they are identical. In my experience 8bit starts to fall apart when you lift the mids or perform extreme grades, neither of which you commonly do to drone footage. For the typical YouTube video you won't see a single difference in quality.

Anyways, your settings are not ideal either:
Daylight:
Aperture: F11 This is not the best setting. As most cameras are the sharpest around f4.5. With the EVO 8K in higher aperture values I noticed a distinct softness with everything except dead center and I suspect the same is true for the 6K Pro. That is what filters are for.
Shutter: Whatever is needed This is against the 180-degree rule and may result in unrealistic motion blur, or the lack thereoff.

This has been debated to death on this forum. You can read this thread which will answer every concern you just raised on why I shoot the way that I do. I would say that thread changed a lot of people's opinions and countered a lot of the common misconceptions that are out there.

ISO: 100 I also try to use ISO 100. but someone on youtube, I guess droneXfactor was his name, said I should be on 200 to "push" the sensor, at least while shooting in log.

I have no idea where this came from but IMO this is horrible advice. There is no such thing as "pushing the sensor". I think maybe they were referring to the fact that for some cameras the base ISO changes when the camera is switched to a LOG profile. Some cameras and their LOG profiles retain information in the highlights more so than in the shadows (i.e 4 stops over and 2 stops under) and so to optimize their LOG curve they change the base ISO of the camera.

I have a camera right now that uses a dual native ISO and the base ISO changes to 640ISO and 4000ISO when switched to a LOG profile. This is because the camera specifically has dual ISO gain circuitry to support a lower noise floor at those two ISOs.

When a camera/LOG combination is optimal at a different base ISO the manufacturer automatically changes the lower ISO limit when a LOG profile is used. There is no such change when the EVO is switched to a LOG profile and you should always try to shoot at a native ISO for minimal noise so long story short; 200ISO makes absolutely no sense in this scenario.
 
As it stands right now, I might do away with the LOG color profile altogether for 2 reasons:
- The LUTs or the profile is bad. Either way the results are not that promising.
- The control picture while flying is really affected by the flat picture. DJI had a very useful Pre-Lut button, so you could see a colorful picture even while filming in Log, which as a big advandtage when steering your drone. Well, Autel does not.

This is very disheartening since I do have a very powerful Computer and was hoping to unlock the potential of a 10 bit Log profile. But I explains the fact that there is very little graded stuff on youtube, most people use the 6K, no Log.

Unless something is wrong with your camera, the LOG profile is excellent; now the LUTs available for it might be terrible but when properly graded the LOG profile really unlocks the DR of the camera.

You did touch on one of my pet peeves with the EVO which is that Autel has not included what's called a monitoring LUT which is basically a Rec.709 LUT that is applied to the live video feed to make the picture easier to see on your screen. I did get used to shooting without it though, as long as you use the histogram like a WFM the image will always be perfectly exposed; a bit hard to see but perfectly exposed.
 
Also, I noticed you are really focusing on 10bit vs 8bit, when properly exposed and lightly graded they are identical. In my experience 8bit starts to fall apart when you lift the mids or perform extreme grades, neither of which you commonly do to drone footage. For the typical YouTube video you won't see a single difference in quality.
First of all, I find it very refreshing to have a lively forum where to discuss topics which are sometimes difficult to get your head around and you can profit from people with more experience.

Yes, in my experience, there is a difference between 10bit (1024^3 = 1 Billion) and 8bit (256^3 = 17 Mio). Color grading in 10 bit was actually fun and yielded great results, every time. My Sony A7 III shoots 8bit video. I spend litterally days to get the color grading process to work. The results have been less than stellar. So a 2.000$ + lenses camera must yield to a 1.800$ drone, when it comes to grading. So yes, 10 bit does mattter.
Unless you prove me wrong. I would love to shoot in 6k, 30fps and Log, if and only if the Log result looks actually better.
I compared the 6k log footage with the standard LUT (3) and one free LUT from a youtuber (2) to the standard picture profile (1):

1. Standard picture:
The standard picture looked good right out of the box. Even though the picture was perfectly illuminated it showed a cut off in the Lumetri Scopes at around 60, with reds topping of the scale. With some basic corrections and curves I managed to push it up to close 90 on the Lumetrie scope. The blues being close to 0. Most notably I took the red curve a notch down. I seems to be a Sony chip/software, which prefers warm colors - a tad too much for my liking.
It was an icy morning, flying over a meadow next to a river. The top of the gras was partially frozen, white. The light blue sky retains it´s natual color, the soft clouds remain their delicate texture.
It looks good, if not to say great.

2. Correction LUT ( a freebe by a guy named OriginaldoBo)
The profile is even flatter than the original LUT. But it retains the colors pretty well and I could grade it to a pleasing result. The frozen gras was nicely displayed, and the greens were also nice. The sky had retained it´s natural color. But I noticed some banding in the sky. The soft clouds would not remain it´s fine texture. The color starts to fall apart.

3. Standard LUT
The worst, I must confess. Not only were the colors off, which I managed to recover, but the sky had a slight hint at purple and the banding was horrible. As the color bleeding is too obvious, I would render this picture useless.

I do not present on youtube. I hold myself to a much higher standard, at least I hope so.

I would love to squeeze some more DR out of this camera. But as it stands for now, the camera is maxed out at 6k Standard color, being the best picture or I am just not there yet. Help appreciated :)
 
Last edited:
I have also fiddled around with the 4K 10bit material. It was on a different day in a forest glade, but the cloud formations were pretty similar to the day in the meadows. The fine texture was kept in the grading process and colors would not start to fall apart like with the 8bit material.
At this point the findings, at least to me, allow for one statement:
Log in 8bit is a no-go.

I have not decided yet on the "6K Standard" vs "4k Log 10bit".
 
First of all, I find it very refreshing to have a lively forum where to discuss topics which are sometimes difficult to get your head around and you can profit from people with more experience.

Yes, in my experience, there is a difference between 10bit (1024^3 = 1 Billion) and 8bit (256^3 = 17 Mio). Color grading in 10 bit was actually fun and yielded great results, every time. My Sony A7 III shoots 8bit video. I spend litterally days to get the color grading process to work. The results have been less than stellar. So a 2.000$ + lenses camera must yield to a 1.800$ drone, when it comes to grading. So yes, 10 bit does mattter.
Unless you prove me wrong. I would love to shoot in 6k, 30fps and Log, if and only if the Log result looks actually better.
I compared the 6k log footage with the standard LUT (3) and one free LUT from a youtuber (2) to the standard picture profile (1):

1. Standard picture:
The standard picture looked good right out of the box. Even though the picture was perfectly illuminated it showed a cut off in the Lumetri Scopes at around 60, with reds topping of the scale. With some basic corrections and curves I managed to push it up to close 90 on the Lumetrie scope. The blues being close to 0. Most notably I took the red curve a notch down. I seems to be a Sony chip/software, which prefers warm colors - a tad too much for my liking.
It was an icy morning, flying over a meadow next to a river. The top of the gras was partially frozen, white. The light blue sky retains it´s natual color, the soft clouds remain their delicate texture.
It looks good, if not to say great.

2. Correction LUT ( a freebe by a guy named OriginaldoBo)
The profile is even flatter than the original LUT. But it retains the colors pretty well and I could grade it to a pleasing result. The frozen gras was nicely displayed, and the greens were also nice. The sky had retained it´s natural color. But I noticed some banding in the sky. The soft clouds would not remain it´s fine texture. The color starts to fall apart.

3. Standard LUT
The worst, I must confess. Not only were the colors off, which I managed to recover, but the sky had a slight hint at purple and the banding was horrible. As the color bleeding is too obvious, I would render this picture useless.

I do not present on youtube. I hold myself to a much higher standard, at least I hope so.

I would love to squeeze some more DR out of this camera. But as it stands for now, the camera is maxed out at 6k Standard color, being the best picture or I am just not there yet. Help appreciated :)

I do not want to start the usual brand wars :cool: but part of your problem may be the Sony colors not the 8bit footage. I shot with the GH5 for years as well as my C200 and both were 8bit only and as long as the exposure and WB were perfect I had no problems with either. The footage would fall apart though in mixed lighting where more extreme color correction was needed or scenarios where I had to lift the blacks.

With drone footage specifically, all of my drones prior to the EVO II 6K were 8bit only and I never had a problem color grading them. I will admit that I stay away from 6K and 4K60FPS specifically because they are 8bit only, but I wouldn't hesitate to shoot in 6K or 4K60FPS when needed and would have no problems mixing that footage with the 10bit footage. In fact some of the scenes in my Explore Your World EVO II 6K video were shot at 6K30FPS.

Now with my cinema cameras...I absolutely agree that 10 bit is critical; its so good that it almost matches the editing latitude of raw footage. All of my regular cameras now support 10 bit and I couldn't imagine going back to 8bit. Mixed lighting, highlight rolloff, and lifting the mids to compensate for lack of fill lighting are all scenarios where 8bit falls apart quickly.

For drone footage there is typically only a single key light (the sun), so no mixed lighting, in LOG the highlight rolloff is perfect, and I rarely lift the mids because there's no need, so that's why with drone footage I don't consider 10bit as critical.

I do think if you try Davinci Resolve, and hand grade the primaries using the WFM and primaries wheels you will truly unlock the power of LOG for the EVO II 6K. I got the EVO II after I switched from Premier so I can't say with certainty that Premier could achieve the same results.
 
And here I thought I understood the color banding problem. I recently produced a 4K 8-bit color video with lots of cloudless sunrise sky. I used DaVinci Resolve Studio and "delivered" a 10-bit video. It looked clean on my 4K 8-bit monitor. But when I uploaded it to YouTube, the was a lot of color banding in the sky. So, I made an 8-bit video and uploaded it to YT just on the hunch that YT was having trouble with the 10-bit file made from an 8-bit shot. I tried H.265 and H.264. They both looked pretty clean on my system. But on YT, ugly color banding. So, I pulled up an E2P 10-bit file with lots of gradual color gradation and uploaded it to YT. That file played smooth as silk on my system but had significant color banding in YT. Does anyone have a solution for this (I'm looking at you herein2021)?
 
And here I thought I understood the color banding problem. I recently produced a 4K 8-bit color video with lots of cloudless sunrise sky. I used DaVinci Resolve Studio and "delivered" a 10-bit video. It looked clean on my 4K 8-bit monitor. But when I uploaded it to YouTube, the was a lot of color banding in the sky. So, I made an 8-bit video and uploaded it to YT just on the hunch that YT was having trouble with the 10-bit file made from an 8-bit shot. I tried H.265 and H.264. They both looked pretty clean on my system. But on YT, ugly color banding. So, I pulled up an E2P 10-bit file with lots of gradual color gradation and uploaded it to YT. That file played smooth as silk on my system but had significant color banding in YT. Does anyone have a solution for this (I'm looking at you herein2021)?

Yes, for one thing, you cannot turn an 8-bit video into a 10bit video, the missing color space is lost forever as soon as you record it (similar to shooting JPG vs RAW) and it is not possible to add it back later...doing so will only make your file sizes larger without providing any added benefit and may introduce other problems as the NLE tries to fill in the missing values with incorrect 8-bit values.

The trick to YT is to use the optimal bitrate based on the resolution of the video. The second trick is to always upload at least 2K. Even if your timeline resolution was 1080P, upscale the video to 2K within Davinci Resolve because YT gives you a better compression codec when you upload 2K or higher. Google posts an excellent chart that breaks down their optimal data rates. You never want to exceed those data rates or when Google re-encodes the video, their compression will add a lot of artifacts to your video.

Here is a link to the chart: Recommended upload encoding settings - YouTube Help

I suspect either your bitrate was too low and caused the banding when it uploaded to YT, or too high and YT's re-compression process added the banding. Also, how did you check the video afterwards? You have to wait about 30min+ for YT to finish the 4K version and you have to click the gear icon and select 4K because sometimes YT drops the resolution to something lower which will introduce artifacts because those higher compression ratios for 1080P and 720P are way worse. Funny thing is, many people focus so much attention on 8bit vs 10bit when in reality the bitrate is way more important.

Personally, below is what I have found works best for my YT upload settings. My bitrates are lower than the YT bitrates because I don't shoot sports or fast-moving action so I did a lot of testing and decided to go lower than the YT recommended to keep file sizes down which makes my uploads faster and reduces storage especially if I am delivering the finished video to a client. Time is money so everything to decrease time is important. Also, keep in mind that unless you are a celebrity, you will never get the best codecs from YT, they reserve the lower compression codecs for certain tiers of users so that's why some of the clearest best looking YT videos will be from celebrities, news outlets, etc.


DR_Export_Settings.JPG
 
Yes, for one thing, you cannot turn an 8-bit video into a 10bit video, the missing color space is lost forever as soon as you record it (similar to shooting JPG vs RAW) and it is not possible to add it back later...doing so will only make your file sizes larger without providing any added benefit and may introduce other problems as the NLE tries to fill in the missing values with incorrect 8-bit values.

The trick to YT is to use the optimal bitrate based on the resolution of the video. The second trick is to always upload at least 2K. Even if your timeline resolution was 1080P, upscale the video to 2K within Davinci Resolve because YT gives you a better compression codec when you upload 2K or higher. Google posts an excellent chart that breaks down their optimal data rates. You never want to exceed those data rates or when Google re-encodes the video, their compression will add a lot of artifacts to your video.

Here is a link to the chart: Recommended upload encoding settings - YouTube Help

I suspect either your bitrate was too low and caused the banding when it uploaded to YT, or too high and YT's re-compression process added the banding. Also, how did you check the video afterwards? You have to wait about 30min+ for YT to finish the 4K version and you have to click the gear icon and select 4K because sometimes YT drops the resolution to something lower which will introduce artifacts because those higher compression ratios for 1080P and 720P are way worse. Funny thing is, many people focus so much attention on 8bit vs 10bit when in reality the bitrate is way more important.

Personally, below is what I have found works best for my YT upload settings. My bitrates are lower than the YT bitrates because I don't shoot sports or fast-moving action so I did a lot of testing and decided to go lower than the YT recommended to keep file sizes down which makes my uploads faster and reduces storage especially if I am delivering the finished video to a client. Time is money so everything to decrease time is important. Also, keep in mind that unless you are a celebrity, you will never get the best codecs from YT, they reserve the lower compression codecs for certain tiers of users so that's why some of the clearest best looking YT videos will be from celebrities, news outlets, etc.


View attachment 13316
Thanks for the detailed response.

So, trying to improve an 8-bit color video by producing at 10-bit is a waste of of time and disk space. Got it.

I generally shoot in 4K/30 with the E2P and use LOG, H.265 to get 10-bit color. I set my timeline to 4K/30 in DaVinci Resolve. I then deliver in the same codec, resolution, bit rate and color bit depth (Main10) as the original. That will be much higher bit rate than YT recommends. I'll try producing a video at the recommended maximum bit rate and see how that works. I'll post results here.

Since I'm a hobbyist, I'm not that concerned about large file sizes. YT viewers are my "customers" and I want to give them the best possible viewing experience.
 
Last edited:
  • Like
Reactions: herein2021
Thanks for the detailed response.

So, trying to improve an 8-bit color video by producing at 10-bit is a waste of of time and disk space. Got it.

I generally shoot in 4K/30 with the E2P and use LOG, H.265 to get 10-bit color. I set my timeline to 4K/30 in DaVinci Resolve. I then deliver in the same codec, resolution, bit rate and color bit depth (Main10) as the original. That will be much higher bit rate than YT recommends. I'll try producing a video at the recommended maximum bit rate and see how that works. I'll post results here.

Since I'm a hobbyist, I'm not that concerned about large file sizes. YT viewers are my "customers" and I want to give them the best possible viewing experience.

I suspect your bitrate being too high was the culprit. The bitrates out of the EVO II are way higher than YT recommends so they will re-compress your video at suboptimal rates. The EVO II can go up to 120Mb/s which is many times what you need. By comparison, a DVD has a bitrate of around 10Mb/s. I have found that at 16Mb/s all of the types of content that I shoot have no degradation in quality. Also, ensure you are using a VBR vs a CBR for better YT results.

If you are filming fast action or something where every frame changes from frame to frame (like a timelapse) then I would push the bitrate up to the very edge of what YT will accept which is 35Mb/s but keep the upper restriction at 35Mb/s especially when using VBR.
 
  • Like
Reactions: Rubik3x

Latest threads

Members online

Forum statistics

Threads
11,228
Messages
102,655
Members
9,818
Latest member
redwingaerials